FaceSafe: removing a privacy risk instead of managing it
In human factors studies at Apple, every participant photo had to be blurred by hand, then every unblurred original had to be found and deleted. I spotted the risk, scoped the smallest tool that would remove it, and built it with AI. It went from a trial on my own phone to an internally hosted tool that about two teams at Apple now use across multiple projects.
- Reframed the problem from “blurring is slow” to “an identifiable original should never exist.”
- Scoped v1 to the real use case: one participant, headphones visible, nothing saved unblurred.
- Built it with Claude, owning the spec, testing and every product call.
- Trialled it on my own phone, demoed it to my team, ran testing and trials, and it’s now hosted internally and used by ~2 teams at Apple.
- v2 built the app around a real session: study file naming, Next participant, auto-advancing orientations and Files app folders per study.
A manual step that existed only to undo a risk
The real problem wasn’t that blurring was slow. It was that an identifiable photo existed at all. A faster blur tool, a checklist or a batch script would all still leave originals around to clean up. So the product goal became: the unblurred photo is never saved.
Who it’s for, and what the study demanded
Researcher in session
Needs to capture photos fast without breaking the flow of a session with a participant.
Study teams
Needs confidence that no participant PII persists anywhere after a study.
The headphones must show
Participants wear the over-ear headphones being studied. The photos exist to show fit, so a full-face blur would make them useless.
Scoped to the real use case
- Cover the face at capture, before anything is written
- Save only the covered image
- Keep hair, ears and headphones visible
- Strip location and camera metadata
- Run fully on-device
- Live preview of where the cover will land
- A manual fallback when no face is detected
- A few cover styles and sizes, all fully private
- Multiple participants per photo
- Video
- Cloud sync or sharing
- Android
Our studies have one participant in frame. Scoping to that kept v1 small enough to ship.
One tap, and the only photo saved is already safe
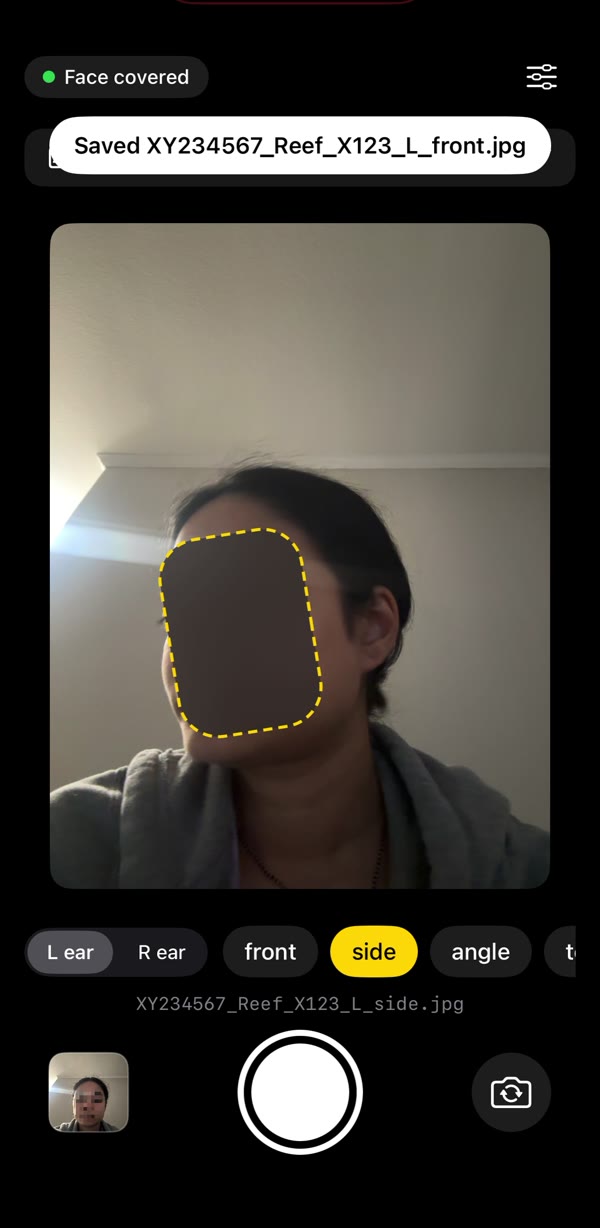
Demo photos use my own face. No participant images are shown.
The settings, and why each one exists
All three permanently remove facial detail. Blur is pixelated first, then blurred, so the detail can’t be recovered. Solid is the most conservative. Teams pick the look that suits their report; none of the options is less private.
Covers the eyebrows, eyes, nose and mouth. Each size grows height more than width, so even Generous stays clear of the headphones. Try it in section 06.
One tap and the covered photo is saved, so the session keeps moving. Turn it off and every photo opens a review screen first. Photos where no face is detected always open for review.
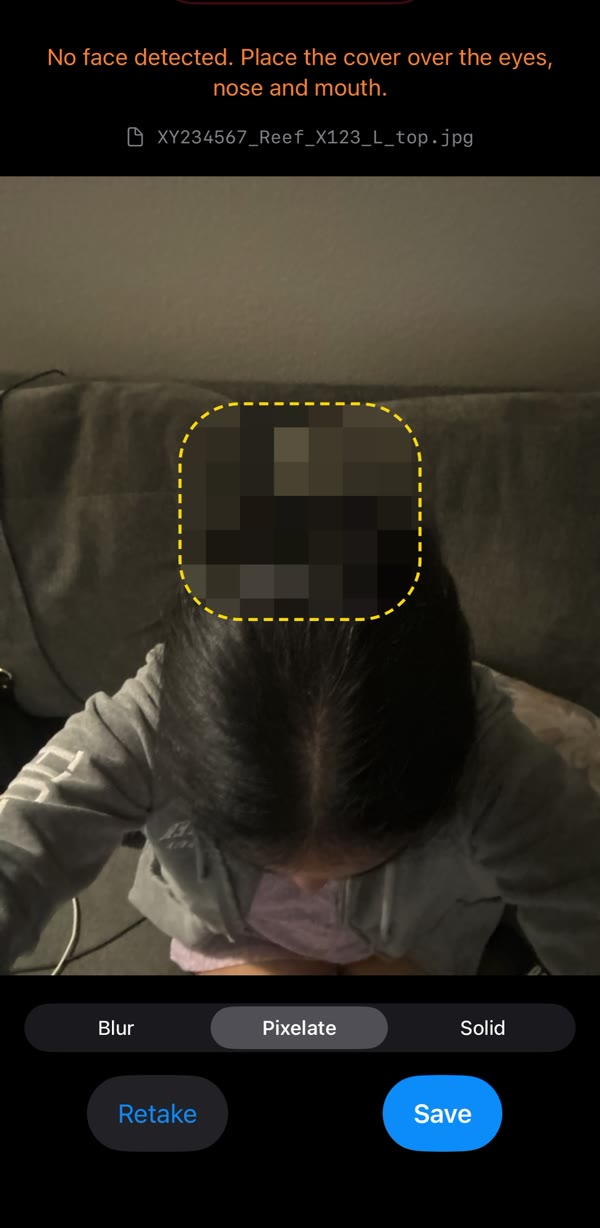
Opens automatically when no face is detected, so the cover can’t be wrong or missing. The researcher moves and resizes the cover over the eyes, nose and mouth, then saves.
These aren’t toggles. They’re fixed guarantees, listed in Settings so researchers can see exactly what the app promises.
A live prototype, using your camera
This web prototype recreates how FaceSafe behaves on the iPhone: live cover preview, capture, cover styles and sizes, and study file naming.
- Start the camera and the cover follows your eyebrows, eyes, nose and mouth
- Open settings (⚙) to switch Blur, Pixelate or Solid and Tight, Standard or Generous
- Set the session, ear and orientation, and watch the file name change. Pick “front” to see L/R drop out
- Tap the shutter to save a covered photo. Retakes get _2, _3
- Bring someone else into frame: only the closest face is covered
Built for the web with an in-browser face-tracking model (MediaPipe). The iOS app uses Apple’s Vision framework.
The trade-offs I made, and why
Cover the features, not the whole face
Covers eyebrows, eyes, nose and mouth only. Less coverage than a full-face blur, but the photos stay useful as fit evidence, which is the whole reason they’re taken.
Instant save by default
Speed for the normal case. A review screen opens only when no face is detected, or if a researcher turns instant save off to check every photo.
Privacy by design, not by process
The original stays in memory and is never written to disk or Photos. There’s nothing to delete, so there’s nothing to forget to delete.
Few settings, on purpose
Three cover styles (Blur, Pixelate, Solid) and three sizes (Tight, Standard, Generous). Every option permanently removes facial detail, so researchers can adapt to the setup without ever choosing a less private result.
Claude wrote the code. I owned the product.
I built FaceSafe with Claude. My job was the PM’s job: write the requirements, define what “done” meant, test it in realistic conditions, and decide what to change when the first version fell short (section 08). That split let me go from problem to a working app without waiting for engineering time.
How it works, from shutter to saved photo
FaceSafe is a native SwiftUI app. All face detection runs on the phone with Apple’s Vision framework, so no image ever leaves the device.
- FaceMasker.swift: finds the face and sizes the cover
- CameraModel.swift: camera session, live preview and capture
- Models.swift: settings and the cover’s shape
- SupportViews.swift: supporting screens, like the camera-permission prompt
- FaceSafeApp.swift: the app’s entry point
enum Coverage {
  case tight, standard, generous

  // Width padding is kept small so the
  // cover stays clear of the headphones.
  var widthFactor: CGFloat {
    switch self {
    case .tight:    return 1.05
    case .standard: return 1.15
    case .generous: return 1.30
    }
  }
}
Every size pads width less than height, so “headphones stay visible” holds whichever option a researcher picks.
Getting it onto a phone, with no App Store
For the trial, I installed FaceSafe on my own iPhone straight from Xcode, using a free Apple developer account. No App Store, no review, no engineering ticket.
- Developer Mode didn’t appear on the phone until Xcode finished preparing the device.
- A missing import caused six build errors; I worked through the fix with Claude.
- Signing asked for passwords I had to figure out (Mac login vs. Apple ID).
Apps signed with a free account expire after a few days. That’s fine for proving the idea, but not for a team relying on it in studies. That limit is why the next step after the trial was a demo, testing with the team, and getting it hosted on Apple’s internal server.
Where I pushed back on Claude’s first version
Claude’s first version handled the basic case, but it didn’t hold up in a real study room. I tested it in realistic conditions, named what was wrong, and told Claude what the right behavior had to be. These are the two changes I made.
The next manual step: naming and sorting every photo
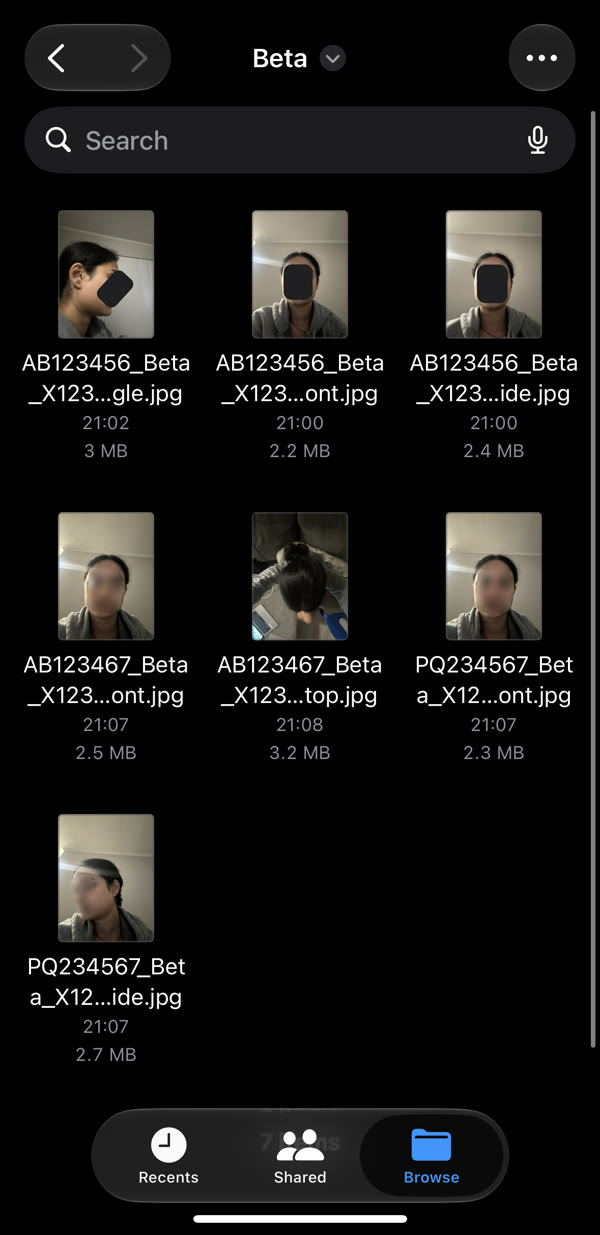
Once faces were handled, the next friction point was everything around the photo. Each one has to follow the team’s naming convention so it lines up with the study data, and researchers shoot several angles per participant, back to back:
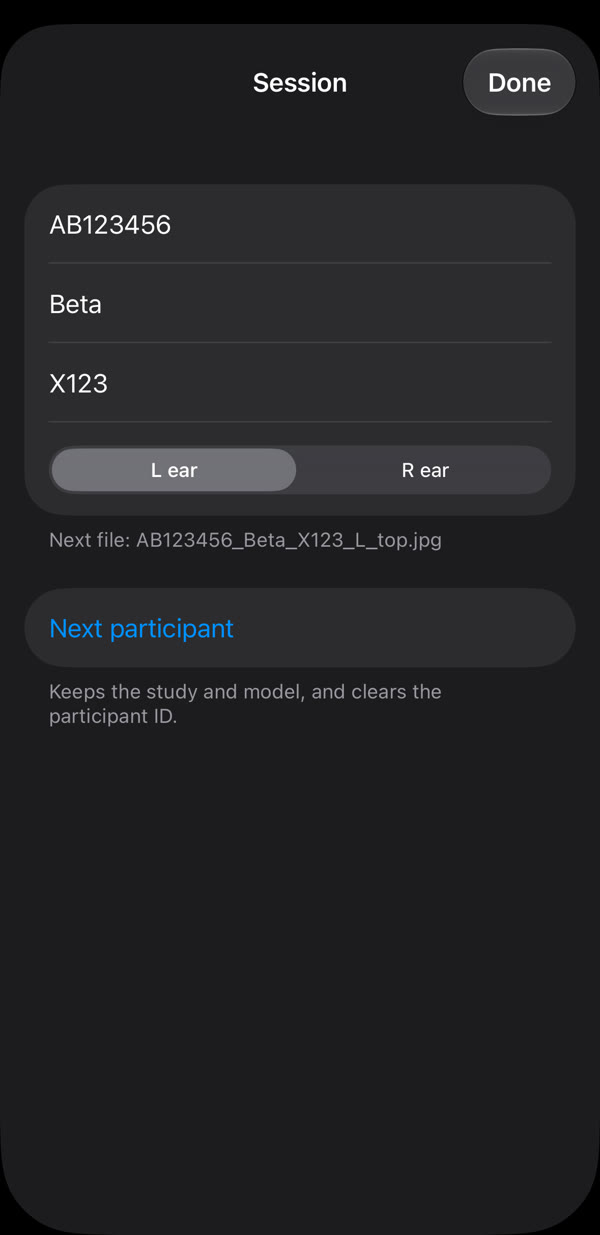
- A session bar on the camera screen holds participant ID, study and model
- Next participant keeps the study and model and clears only the ID
- Ear (L / R) and orientation chips sit right on the camera screen
- A live preview shows the exact file name before you shoot
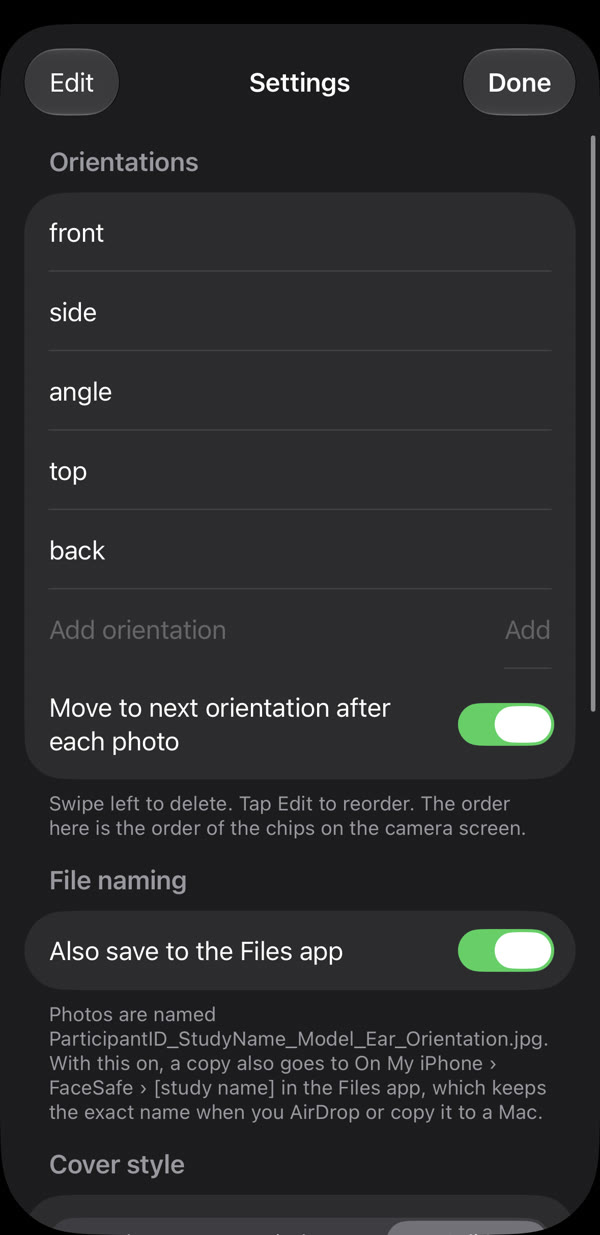
- After each photo it moves to the next orientation automatically (you can turn this off)
- The orientation list is editable in Settings: add, delete and reorder. The order sets the chips
- Retakes get _2, _3, so nothing is overwritten
- A saved toast confirms the exact file name
- A copy goes to the Files app, in a folder per study (On My iPhone › FaceSafe › study name)
- Photos can rename files on export, so the Files copy keeps the exact name when AirDropped or copied to a Mac
- Top and back shots often show no face at all
- When no face is detected, a review screen opens: move and resize the cover, then Retake or Save
- Nothing is saved until a cover is in place
v1 removed the privacy cleanup. v2 removes the naming and sorting cleanup. Each rule came from watching how sessions actually run, not from the first spec. Try it in the live prototype above: set the session, take a few photos and watch the orientation move on and the names update.
From my phone to ~2 teams at Apple
How I’d measure it, and where I’d take it
- Share of study photos captured through FaceSafe
- Detection miss rate (captures that need manual review)
- Time from capture to a usable photo
- PII incidents, with a target of zero
- Flag low-confidence detections for a quick second look
- Export straight to the study’s shared folder
- Bring it to more research teams at Apple
The best fix removed the step
- Speeding up a risky step still leaves the risk. Designing it out removed the cleanup work entirely.
- Tight scope came from the real use case, not a feature list.
- Building with AI shifted my work to spec, testing and judgement, which is where product work lives anyway.
Case study by Apoorva Revankar. Demo photos use my own face; no participant images or internal Apple materials are shown.


